

This tutorial i will show you how to make a screen shot (capture screen) program in vb.net:
Create a new program (I am using Visual Basic 2010 Express Edition for this Tutorial)
Click on Project next to Create:


Add three buttons to the form. Change the text of the first button to Shoot. This button will capture the screen. Change the second button to Save, and the third button to Area:


Change the Anchor property of the Save button to Top, Left, Right.
Change the Anchor property of the Area button to Top, Right.
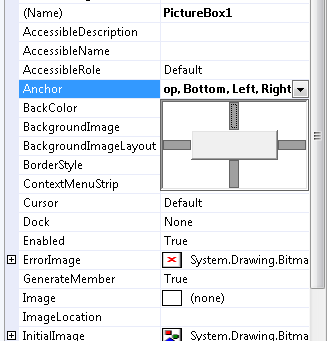
Add a picture box from the toolbox to the form.


We will add one more form to the project. The new form will determine the area of the screen to be captured by the Screen Shot Project.
On the Project menu, click on Add Windows Form:

Change some properties of the new form.
Change the text of the form to "Click here and drag".
Remove the Control box from the form. In the properties window, change Control Box property to False.
Change the Opacity of the form to 50%
The Opacity property determines the transparency of the form. In other words, changing the Opacity property to a lower number, let the user see what behind the form.

The form should look like this:

Shoot Button Code
SHOOT BUTTON CODE
Private Sub Button1_Click(ByVal sender As System.Object, ByVal e As System.EventArgs) Handles Button1.ClickForm2.Hide()
Dim area As Rectangle
Dim capture As System.Drawing.Bitmap
Dim graph As Graphics
area = Form2.Bounds
capture = New System.Drawing.Bitmap(area.Width, area.Height, System.Drawing.Imaging.PixelFormat.Format32bppArgb)
graph = Graphics.FromImage(capture)
graph.CopyFromScreen(area.X, area.Y, 0, 0, area.Size, CopyPixelOperation.SourceCopy)
PictureBox1.Image = capture
End Sub
SAVE BUTTON CODE
Private Sub Button2_Click(ByVal sender As System.Object, ByVal e As System.EventArgs) Handles Button2.ClickDim save As New SaveFileDialog
Try
save.Title = "Save File"
save.FileName = "Screenshot"
save.Filter = "Png |*.Png"
If save.ShowDialog() = DialogResult.OK Then
PictureBox1.Image.Save(save.FileName, System.Drawing.Imaging.ImageFormat.Png)
End If
Catch ex As Exception
End Try
End Sub
AREA BUTTON CODE
Private Sub Button3_Click(ByVal sender As System.Object, ByVal e As System.EventArgs) Handles Button3.ClickForm2.Show()
End Sub
SAVE AND RUN THE PROGRAM
Shoot Button Code
Shoot Button Code


nice one bro
ReplyDeletethanks bro...don't forget to subscribe bro
ReplyDelete